Visual regression tests#
This chapter describes how to run visual regression tests with Playwright.
Workflow#
VLT has a set of visual regression tests implemented using Playwright. We use these tests to ensure that visual aspects of the application remain consistent over time and that the UI is resilient to regressions caused by unintended changes while developing new features or fixing bugs.
VLT CI runs visual regression tests on every pull request to the main branch.
VLT has two types of visual regression tests: Volto visual regression tests : These tests cover the main Volto application, including common components, blocks, and pages. Storybook visual regression tests : These tests cover the Storybook stories, ensuring that individual components render correctly.
Normally, you don't need to run visual regression tests locally, as they are executed in the CI environment. Whenever a visual regression test fails in CI, you can review the results, fix the regressions, and update the baseline screenshots, if necessary.
When a visual regression test fails, the CI job generates artifacts that you can download to review the visual differences and decide whether to accept the changes or fix the issues.
Review and update visual test results#
Note
In the previous incarnation of the visual regression tests, we used Cypress and we saved the screenshots in development time. However, this approach had some drawbacks, since CI might have different rendering results than local machines because of different operating systems, browser versions, fonts, and other factors. Therefore, we switched to a CI-only based approach using Playwright, where the screenshots are generated and compared only in the CI environment. You can still develop, run, and review visual regression tests locally using Playwright's UI mode or headless mode.
Important
Make sure that your branch is up to date with the main branch before running visual regression tests, as other pull requests might have updated the baseline screenshots.
An outdated branch might lead to false positives or conflicts when updating the baseline screenshots.
Typically, the development workflow will be as usual, and eventually, you might run into visual regression test failures in CI.
After that, you can download the artifacts from the CI run.
Once downloaded, extract the artifacts zip into a folder on your computer.
One of the artifacts is trace.zip.
You can open it using Playwright's test runner UI to review the visual differences.
A video is also available in the artifact to see how the test ran in CI.
Open a Playwright trace locally#
Download the artifact from the CI job.
Run this command in the
frontendfolder:pnpm exec playwright show-trace path/to/trace.zip
This will open a window, where you can review the trace results and check the visual differences inside the Playwright Test Runner UI.
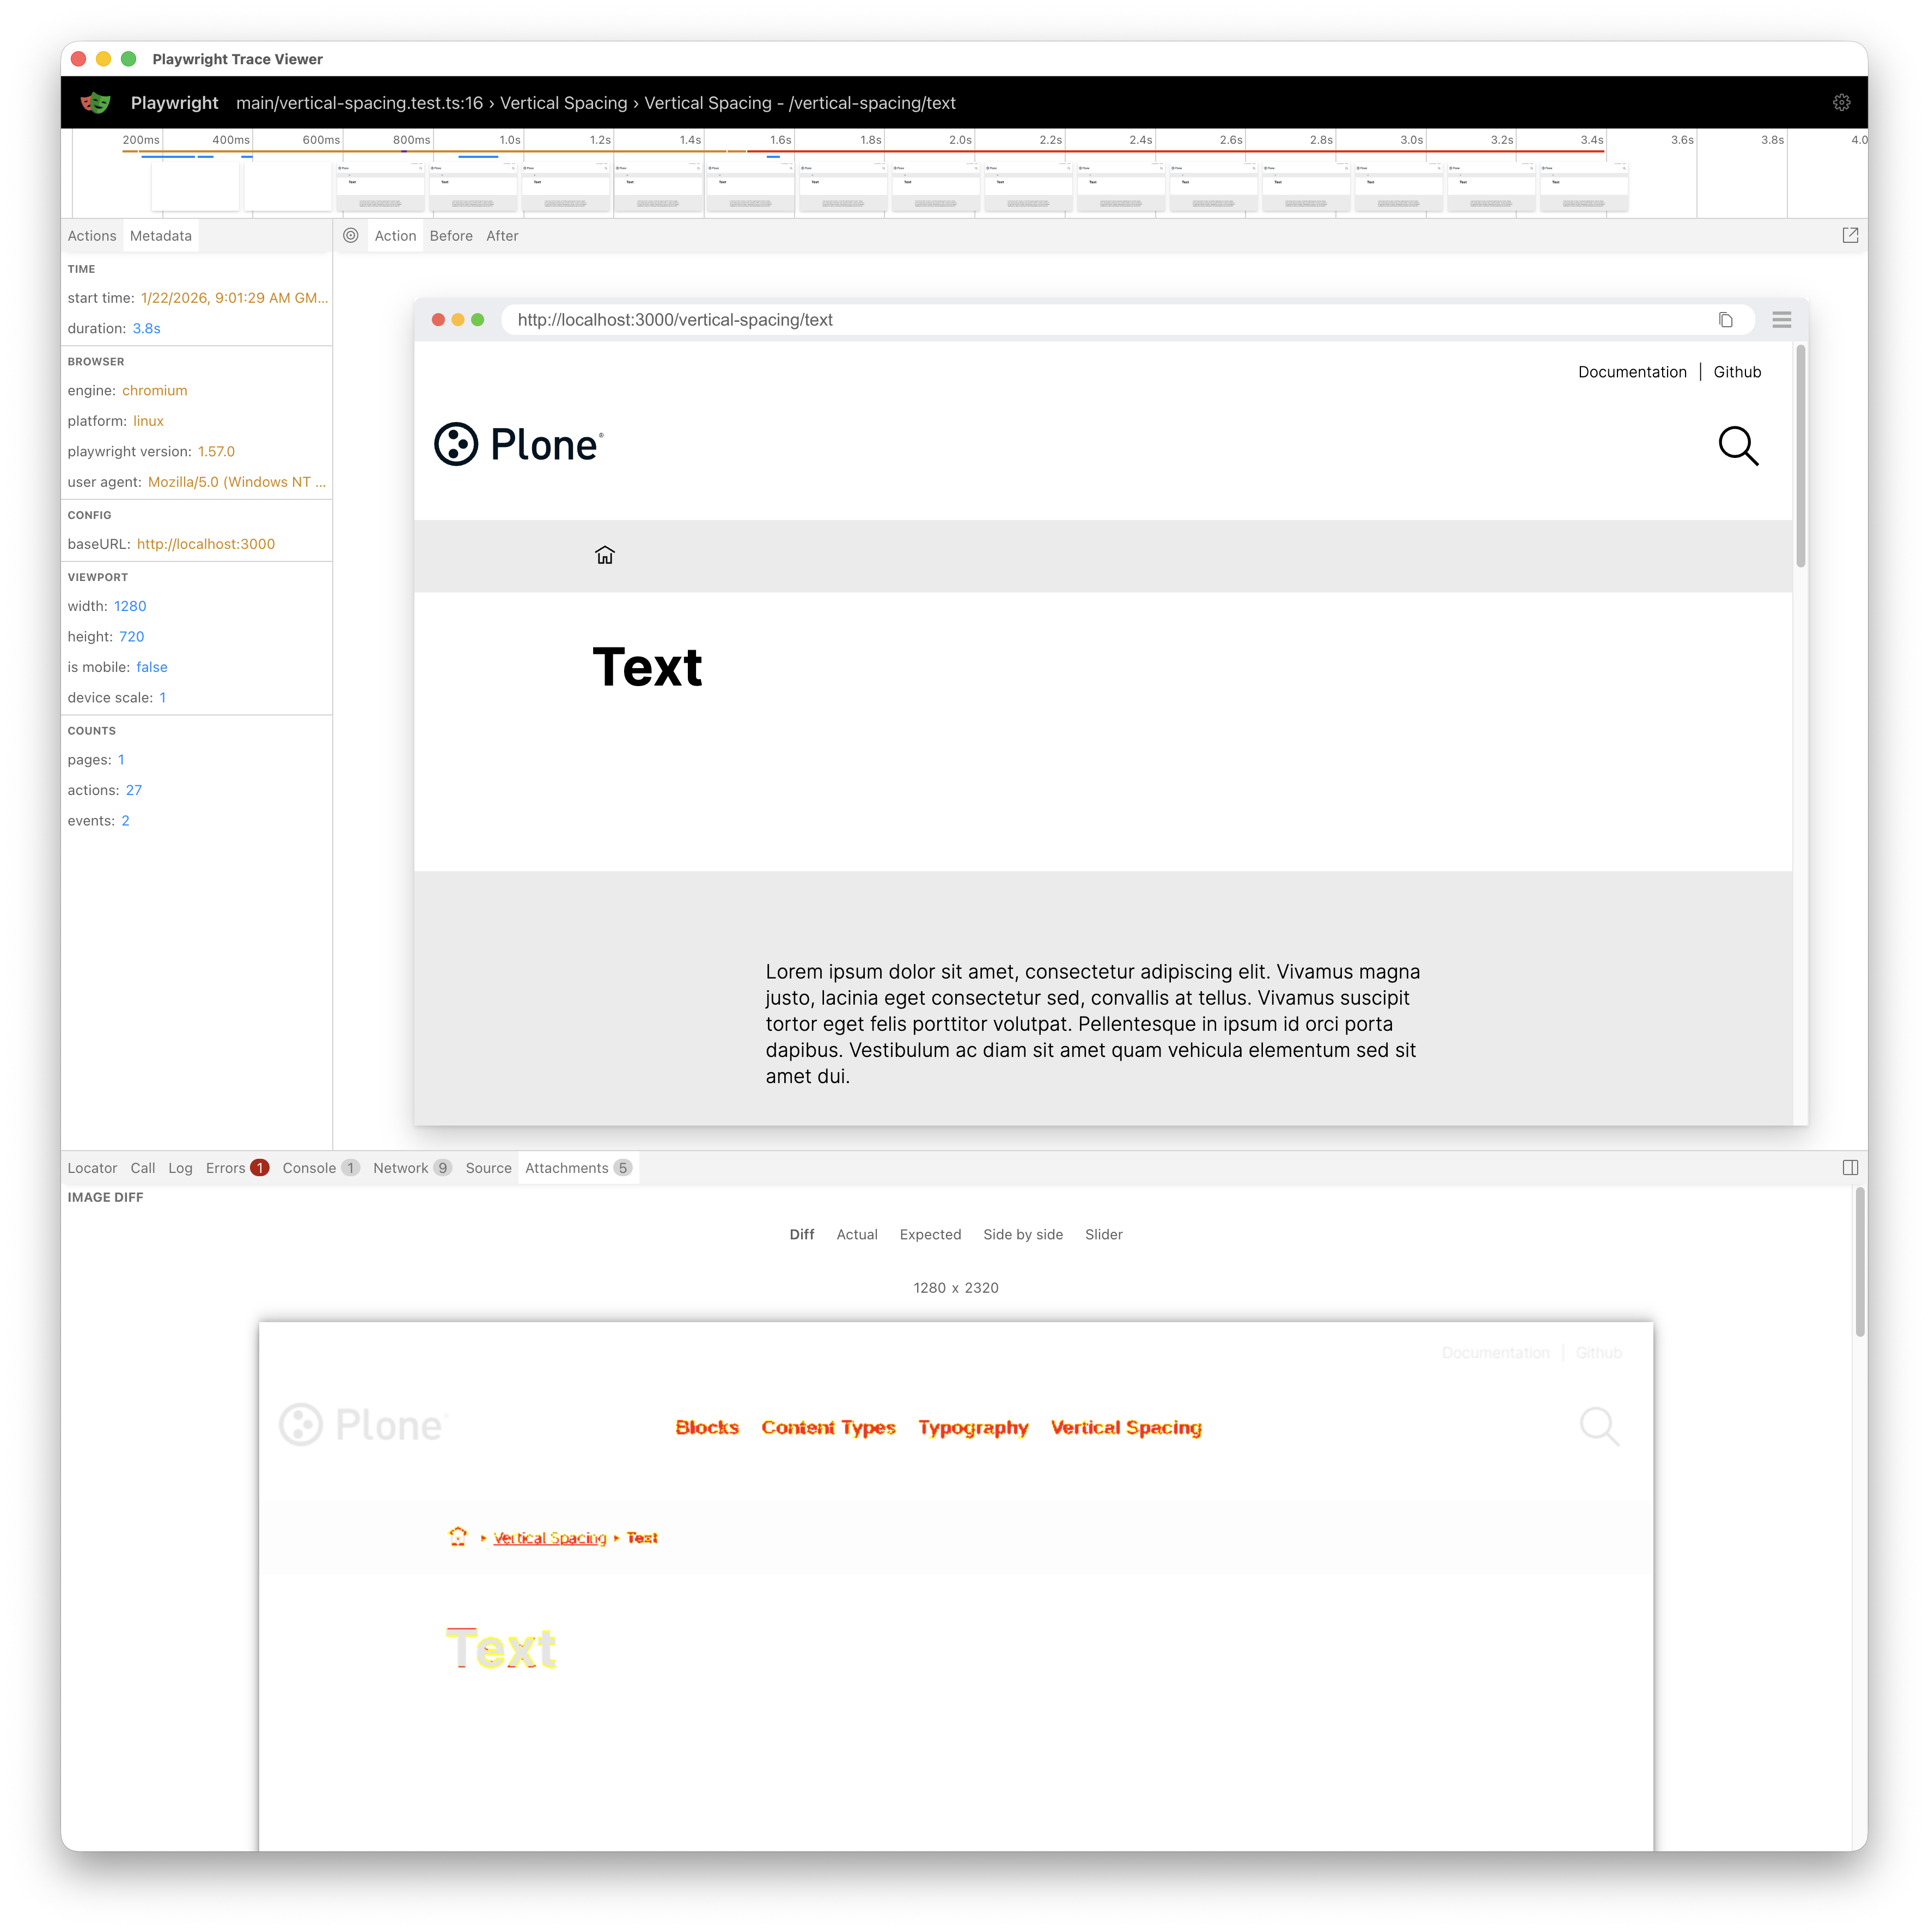
At the top left, you can see the metadata of the test run. In the center, there's the screenshot taken during the test run. At the bottom, there's a menu where you can select the different tabs from the browser, and other specific data.
Click on the attachments tab. You can see a list of tabs for selecting the different screenshots taken during the test run, and specifically:
- Diff
Shows the differences between the baseline and the new screenshot.
- Actual
Shows the newly captured screenshot.
- Expected
Shows the baseline screenshot.
- Side by side
Shows both screenshots side by side for easier comparison.
- Slider
Shows both screenshots with a slider to compare them interactively by dragging the slider left and right.
Update baseline screenshots#
If you've reviewed the visual differences and determined that the new screenshots are correct—in other words, the changes are intentional and acceptable—then you can update the baseline screenshots. To do this, follow these steps:
Go to the GitHub Actions tab in the VLT repository.
Use the workflow Update VRT Screenshots or Update VRT Screenshots Storybook depending on which screenshots you want to update. You might need to click Show more workflows... to reveal these options.
Click on the Run workflow dropdown and select your branch.
Click the green Run workflow button.
The workflow will run and update the screenshots repository with the new baseline screenshots. Run the visual regression tests again in your pull request to ensure that everything passes with the updated screenshots.
Warning
Once updated, merge the pull request as soon as possible to avoid conflicts with other ongoing pull requests.
Run visual regression tests locally#
This section describes how to set up and run visual regression tests locally.
Prerequisites#
The screenshots directory contains the baseline screenshots used for comparison during the visual regression tests and it is stored in a separate git repository.
It is checked out into frontend/playwright/__screenshots__.
You can also set up the visual regression tests manually with the following command.
make sync-visual-regression-snapshots
Note
The commands of the sections below set up the visual regression tests by running the aforementioned command, checking out the screenshots repository, and configuring the test environment before running the tests.
Run Volto visual regression tests#
The tests can also be run locally while developing new features or fixing bugs. The following steps run visual regression tests for Volto.
Follow these steps to run visual regression tests:
Start the backend
make backend-startStart the frontend
make acceptance-visual-frontend-prod-startRun Playwright for visual testing
make acceptance-visual-test
Alternatively, you can run Playwright visual tests, narrowing down to an individual test file, for example, playwright/tests/visual/main/blocks.test.ts:
pnpm exec playwright test playwright/tests/visual/main --ui
Storybook visual regression tests#
Volto has an infrastructure for visual regression testing in Storybook stories. In this case, the setup is a bit different, as we need to start Storybook first, instead of Plone and Volto. You can also run visual regression tests for Storybook:
Build and run Storybook.
make storybook-build
make storybook-start
Run Playwright for visual testing Storybook
make acceptance-visual-test-storybook
Create new visual regression tests#
To create new visual regression tests, you can follow the existing test files as examples as references.
Visual regression tests are located in the frontend/playwright/tests/visual directory.
You can create new test files or add new test cases to existing files, depending on your needs.
This is a basic example of a visual regression test:
import { expect, test } from '@playwright/test';

test('Homepage', async ({ page }) => {
  await page.goto('/', { waitUntil: 'networkidle' });
  await expect(page).toHaveScreenshot('homepage.png', { fullPage: true });
});
In this example, the test navigates to the home page and captures a full screen screenshot named homepage.png.
Tip
Usually, it is better to capture screenshots of specific components or sections of the page, rather than the entire page. This approach helps to reduce noise in the screenshots and makes it easier to identify visual changes. You can achieve this by using Playwright's locator method to target specific elements on the page. For example:
const header = page.locator('header');
await expect(header).toHaveScreenshot('header.png');
When you create a new visual regression test, the screenshot won't exist in the baseline screenshots repository. Therefore, the first time you run the test, it will fail, indicating that the screenshot is missing with a message like this:
Error: A snapshot doesn't exist at: path/to/screenshot.png
You have to run the GitHub CI workflow Update VRT Screenshots or Update VRT Screenshots Storybook depending on which screenshots you want to update in order to generate and store the new baseline screenshot. See Update baseline screenshots for more details on how to update the baseline screenshots. After updating the baseline screenshots, run the visual regression tests again to ensure that the new test passes with the newly created baseline screenshot.